Some of the links in this post are affiliate links. This means if you click on the link and purchase the item, I will receive an affiliate commission at no extra cost to you. All opinions remain my own.
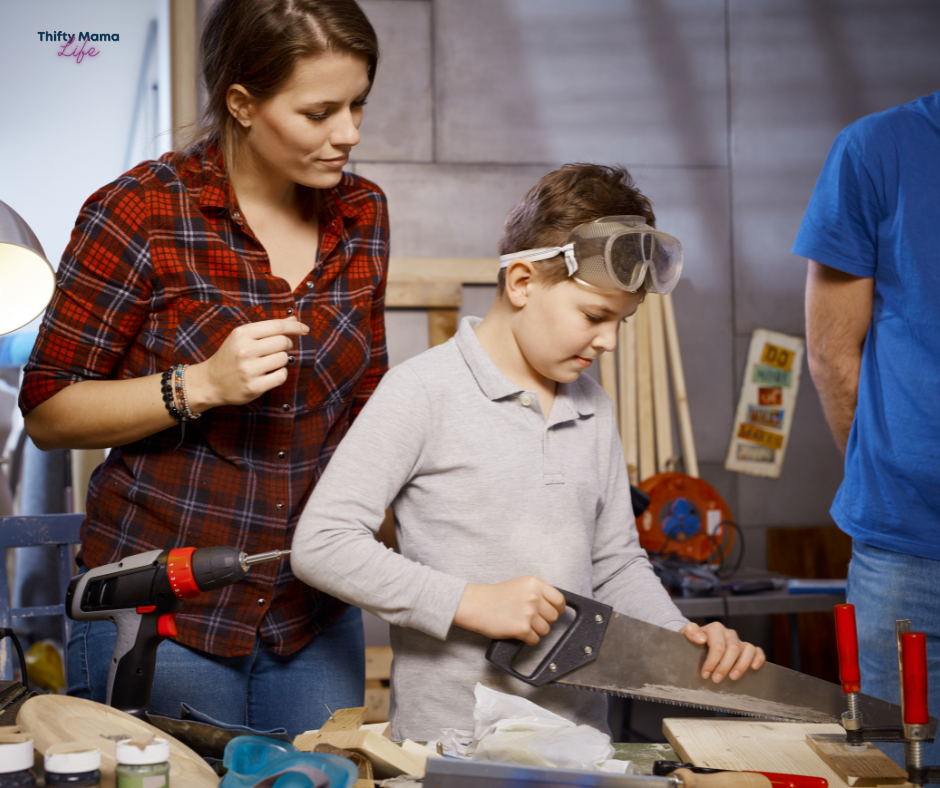
For frugal, homeschooling moms juggling lessons, meals, and a tight budget, home projects can feel like one more demand instead of a win. The tension is real: kids need meaningful work to learn, but time is limited and “helping” can slow everything down. Family-friendly home improvement projects solve that by turning ordinary tasks into skill-building activities for kids that actually fit real life. When projects are truly age-inclusive DIY projects, children get steady confidence-building through small responsibilities, and the home becomes a place for fostering family togetherness.
Choose 7 Low-Cost Projects Your Family Can Finish
When you want the togetherness and confidence boost from DIY with kids, the secret is choosing projects that fit your real time, tools, and energy. Here are seven beginner home improvement projects and frugal DIY activities you can mix-and-match for quick wins.
- Do a “one-wall” paint refresh: Pick one small wall (or just the lower half) and repaint it for a dramatic change without a big budget. Start by letting kids help choose a color from 2–3 pre-approved options, then do a simple job chart: tape, stir, roll, and clean-up. This is a great first painting project because it’s contained, teaches patience, and has a clear before/after.
- Paint a door, cabinet, or trim (small surface = big impact): Instead of tackling a whole room, choose one door, one set of baseboards, or 2–4 cabinet fronts. Clean first, lightly scuff if needed, then paint and let it cure overnight where possible. Kids can be your “hardware helpers” (bagging screws, labeling parts) and learn careful handling and organization, skills that transfer straight to homeschool routines.
- Start a tiny garden you can manage: Keep it simple: one pot, one planter box, or a 3×3-foot patch. Assign jobs, measure soil, place seeds, water, and track growth in a notebook, so everyone contributes without chaos. Many families love this because sowing a seed feels like a small, hopeful project with visible progress.
- Build a “family command spot” with what you already have: Choose one wall or corner and create a low-cost home upgrade using hooks, a basket, and a simple paper calendar. Have kids sort items into three bins: “daily,” “weekly,” and “special” (library books, permission slips, sports gear). This reduces morning stress and quietly teaches categorizing, planning, and responsibility.
- Seal drafts and tighten the basics (fast, frugal, satisfying): Walk the house together with a flashlight and notepad to spot gaps around doors, loose handles, squeaky hinges, and wobbly outlet covers. Make it a scavenger hunt: kids find problems, you decide what’s safe to fix today, and everyone learns that maintenance prevents bigger costs later. Most fixes take 10–20 minutes each and deliver that “we did something real” feeling.
- Refresh a shelf or closet with a simple “keep/donate/store” reset: Pick one micro-zone, one shelf, one drawer, or one coat area, so you can finish in an hour. Set a timer for two 20-minute rounds: sort first, then put away and label. This is a collaborative family project that builds decision-making skills and keeps clutter from eating your time.
- Do one beginner repair that uses only hand tools: Choose something predictable: replace a shower curtain rod, swap a cabinet knob, reattach a loose towel bar, or tighten a wobbly chair. Create a “parts tray” (a bowl works) so nothing gets lost, and let kids handle safe steps like counting screws or holding the flashlight. Once your family is comfortable with this rhythm, spot the problem, gather parts, fix, test, and you’ll feel ready for simple water-related fixes like a slow drip at a faucet.
Pick just one project for today, then stop while everyone still feels successful. Those small wins are what make DIY a habit, not a headache.
Fix a Leaky Faucet Together: A Low-Stress First Repair
Once you’ve picked a few low-cost projects your family can actually finish, a small plumbing fix is a great way to build real-life skills without a big mess.
Tackling simple plumbing repairs together, like fixing a leaky faucet or unclogging a drain, turns “something’s broken” into a hands-on project that everyone can contribute to. Kids can help spot where the drip or slow drain is coming from, hand over parts, and learn the names of basic pieces, while older kids and adults work as a team to handle the trickier parts. The key is setting yourselves up for success by using reliable, professional-grade materials, so the fix lasts and you’re not repeating the same repair next weekend. When you need replacement parts or upgrade basics, start with a reputable plumbing supply source so you can match what you have and feel confident about the quality.
Next, you’ll use a simple 5-step plan to move from “we should fix that” to “we finished it” on any family DIY.
Plan and Finish One Family DIY Project Safely
This 5-step plan helps you choose a realistic project, assign kid-friendly jobs, and keep safety simple so you can finish in one go. For frugal moms, it turns DIY into a predictable routine that builds confidence, life skills, and real savings without chaos.
- Step 1: Define the “one win” and set a finish line
Start with a single, specific goal such as “replace the faucet aerator” or “clear the slow bathroom drain.” Decide your time box and your done definition before anyone picks up a tool so you avoid scope creep and a half-finished weekend. - Step 2: Gather tools, parts, and a 10-minute prep kit
Pull everything into one bin: tools, parts, towel/rag, small bowl for screws, and your cleanup supplies. A quick prep keeps you from running to the store mid-project, which is where budgets and patience tend to disappear. - Step 3: Assign roles by age and attention span
Give kids tasks that match their skills so everyone contributes, and nobody is “in the way.” Elementary kids can do measuring materials and simple sorting, while older kids can read steps aloud, time the work, and check that parts match. - Step 4: Run a 60-second safety check before you start
Confirm you have clear lighting, dry floors, and an uncluttered path for walking in and out with tools, especially if you are working near an entry or garage where serious outdoor hazards can show up fast. Set one boundary rule: kids stand behind a tape line when tools are in use, and only the assigned helper is next to the work area. - Step 5: Do the work, test, and close out with cleanup and notes
Work in short cycles: complete one step, pause, then test for leaks or flow before moving on. Finish by resetting the space, putting leftovers in a labeled bag, and writing one note about what worked so the next project is easier and cheaper.
One calm, finished project teaches more than three abandoned ones.
DIY With Kids: Common Questions Moms Ask
Quick answers for starting strong and staying calm.
Q: What are the most budget-friendly projects that still teach real skills?
A: Start with repairs and refreshes, not remodels: tighten a loose handle, swap a showerhead, patch a small hole, or repaint a shelf. These use few materials, build tool confidence, and give kids a clear “before and after.” It also helps to know DIY is mainstream now, with $857.05 billion in 2024 showing how many affordable options exist.
Q: How do I keep kids safe without hovering the whole time?
A: Choose low-risk tasks for kids like sorting hardware, measuring, wiping surfaces, or holding a flashlight. Keep one adult-only zone for cutting, drilling, and chemicals, and use simple rules like closed-toe shoes and no running. If you can’t supervise closely, pick a “no-tools-in-hands” project like organizing a drawer or applying felt pads.
Q: What skill level do we need if I’m a total beginner?
A: Beginner is perfect as long as the project has a short list of steps and one basic tool. Watch one quick how-to video first, then practice on scrap cardboard or an old board for two minutes. If you can read instructions and go slowly, you can do most small fixes.
Q: When should I stop and call a pro instead?
A: Call a pro for anything involving gas lines, a burning smell, frequent breaker trips, or a leak you cannot quickly shut off. Also, pause if you discover mold, soft flooring, or water damage that keeps spreading. Your “win” can be safely identifying the problem and scheduling help.
Q: How can I fit DIY into a packed week without losing momentum?
A: Pick projects that can be finished in 30 to 60 minutes and limit yourself to one shopping trip max. Do a quick reset right after, then jot one note about what you used so you can reuse supplies next time. Small, repeatable projects protect your energy and your budget.
One simple project this week can bring back money and build lifelong confidence.
Start One Small DIY Project to Save Money Together
When money is tight and schedules are full, home repairs can feel intimidating, especially with kids underfoot. The steady way forward is a simple DIY mindset: choose beginner-friendly projects, learn one skill at a time, and keep progress consistent rather than perfect. As small wins stack up, confidence grows, costs drop, and children start picking up real-life skills through DIY, measuring, planning, problem-solving, and safe tool habits. Start small, stay steady, and let your home teach your family. Pick one project to begin this week and invite the kids to help with a simple job they can handle. Those shared minutes build family connection and resilience that carry far beyond the fix itself.